Quick start (Next.js)
This guide adds a deposit button to a Next.js App Router app. It follows examples/next-demo. It uses the mock adapter first, so you need no provider account.
Start from a Next.js App Router app with TypeScript, for example from npx create-next-app@latest. It sets the @/* import alias that this guide uses. Without the alias, use relative imports. You will create four files on the server side and one client component, and then render the component on a page:
| File | Role |
|---|---|
lib/openramp.ts | Creates the OpenRampKit server once |
app/api/openramp/[...path]/route.ts | Mounts the handler at /api/openramp |
app/api/deposit-session/route.ts | Your backend: creates a session for the signed-in user |
app/api/hooks/route.ts | Your backend: receives signed events and credits the user |
components/Deposit.tsx | The provider and the button |
app/page.tsx | Shows the button |
1. Install
pnpm add @openrampkit/server @openrampkit/adapter-mock @openrampkit/adapter-relay @openrampkit/reactNot on npm yet
The packages are not on npm yet. See Try it before the npm release.
2. Environment
# .env.local
OPENRAMP_SECRET=replace-with-32-plus-random-characters-xxxxxxxx
OPENRAMP_WEBHOOK_SECRET=replace-with-another-random-secret
PUBLIC_URL=http://localhost:3000
OPENRAMP_SECRET must have at least 32 characters. OPENRAMP_WEBHOOK_SECRET must have at least 16 characters. If a secret is too short, createOpenRamp throws. Use openssl rand -hex 32 to make a strong secret.
3. Create the server
Put the instance in a shared module. A Next.js route file may only export route handlers and route config, so do not export the instance from the route file.
// lib/openramp.ts
import { mockAdapter } from '@openrampkit/adapter-mock'
import { createOpenRamp } from '@openrampkit/server'

const PUBLIC_URL = process.env.PUBLIC_URL ?? 'http://localhost:3000'

// One instance per server process. In dev, Next.js reloads modules, so keep it on globalThis.
const g = globalThis as unknown as { __openramp?: ReturnType<typeof createOpenRamp> }

export const openramp =
  g.__openramp ??
  (g.__openramp = createOpenRamp({
    secret: process.env.OPENRAMP_SECRET!,
    // The public URL where the handler is mounted (step 4)
    baseUrl: `${PUBLIC_URL}/api/openramp`,
    // Mock mode: every pathway is simulated. No money moves.
    adapters: [mockAdapter({ crypto: true, bridge: true })],
    // Signed events to your backend (step 6)
    webhooks: { url: `${PUBLIC_URL}/api/hooks`, secret: process.env.OPENRAMP_WEBHOOK_SECRET! },
  }))
The default store is in memory. That is fine for next dev. For production, pass a store (see Session stores).
4. Mount the handler
// app/api/openramp/[...path]/route.ts
import { openramp } from '@/lib/openramp'

export const dynamic = 'force-dynamic'
export const { GET, POST, OPTIONS } = openramp.nextHandlers()
The handler strips the path part of baseUrl (/api/openramp) from each request, then routes /sessions/..., /webhooks/... and the rest. See HTTP routes.
5. Create sessions in your backend
Your backend decides who the user is and where the money goes. The browser never sends the destination.
getUser and user.depositAddress stand for your own auth and database. For a first test, you can use a fixed user: { id: 'demo-user', depositAddress: '0x000000000000000000000000000000000000dEaD' }.
// app/api/deposit-session/route.ts
import { openramp } from '@/lib/openramp'
import { getUser } from '@/lib/auth' // your auth

export const dynamic = 'force-dynamic'

export async function POST(req: Request) {
  const user = await getUser()
  if (!user) return new Response('Unauthorized', { status: 401 })

  const session = await openramp.sessions.create({
    userId: user.id,
    // Vercel sets this header. On localhost it is missing, so use a test country there.
    country: req.headers.get('x-vercel-ip-country') ?? (process.env.NODE_ENV === 'production' ? undefined : 'VN'),
    destination: {
      type: 'crypto',
      chain: 'eip155:8453', // Base
      token: '0x833589fcd6edb6e08f4c7c32d4f71b54bda02913', // USDC on Base
      symbol: 'USDC',
      decimals: 6,
      address: user.depositAddress, // from your database
    },
    metadata: { plan: 'pro' }, // echoed back in webhooks
  })
  // { id, clientSecret, expiresAt }
  return Response.json(session)
}
Country
sessions.create() does not read geo headers: it runs in your backend, not in the user's request. Pass country (ISO 3166-1 alpha-2) yourself, for example from the x-vercel-ip-country header of the request that called this route, or from the user's profile. The country picks the local currency and the local methods. Without it, the currency is USD and legs whose region policy does not allow * show as "Not available".
6. Receive webhooks
// app/api/hooks/route.ts
import { openramp } from '@/lib/openramp'

export const dynamic = 'force-dynamic'

export async function POST(req: Request) {
  const body = await req.text() // the raw body, not req.json()
  if (!(await openramp.webhooks.verify(req, body))) return new Response('bad signature', { status: 401 })
  const event = JSON.parse(body) as { id: string; type: string; sessionId?: string }
  if (event.type === 'session.succeeded') {
    // credit the user once per session; see the webhooks guide
  }
  return new Response('ok')
}
Read Webhooks to your backend before you credit real balances.
7. Add the button
// components/Deposit.tsx
'use client'

import { DepositButton, OpenRampProvider, lightTheme } from '@openrampkit/react'

async function getClientSecret() {
  const r = await fetch('/api/deposit-session', { method: 'POST' })
  const { clientSecret } = (await r.json()) as { clientSecret: string }
  return clientSecret
}

export function Deposit() {
  return (
    <OpenRampProvider baseUrl="/api/openramp" theme={lightTheme({ accent: '#2744C4' })}>
      <DepositButton
        getClientSecret={getClientSecret}
        onComplete={(session) => console.log('completed', session.id)}
        onError={(error) => console.log('closed or failed', error.code)}
      />
    </OpenRampProvider>
  )
}
getClientSecret runs when the user clicks. The modal opens at once and shows a loading state while the secret loads.
To render the widget inline instead of in a modal, use OpenRampEmbedded inside the same OpenRampProvider. It takes a client secret, or a function that fetches one:
<OpenRampEmbedded clientSecret={getClientSecret} onComplete={(s) => console.log(s.id)} />Render the component on a page:
// app/page.tsx
import { Deposit } from '@/components/Deposit'

export default function Page() {
  return <Deposit />
}
8. Try it
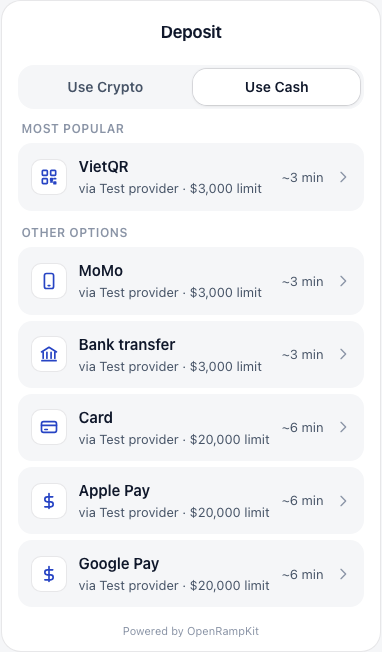
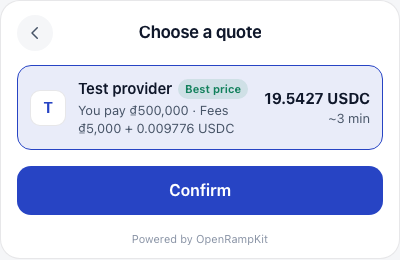
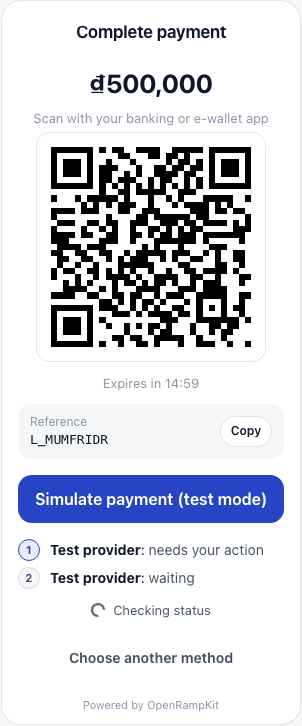
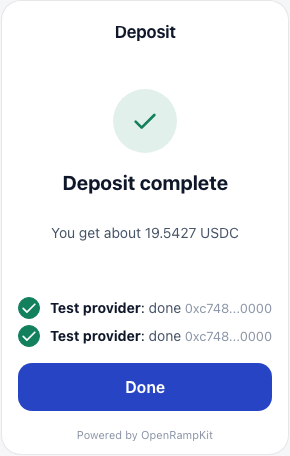
pnpm next devOpen http://localhost:3000 and click Deposit. With the mock adapter, you can pay by card (a mock hosted checkout opens in a new tab), by a local QR method (press "Simulate payment (test mode)"), or by transfer. The local QR methods show only when the session has a country with local methods, for example VN (VietQR and MoMo).
| Methods | Quote | QR | Complete |
|---|---|---|---|
 |  |  |  |
9. Add real providers
Replace or extend the adapters. For example, Relay for real crypto deposits and Xendit for merchant pay-in:
import { relay } from '@openrampkit/adapter-relay'
import { xendit } from '@openrampkit/adapter-xendit'

adapters: [
  relay({ apiKey: process.env.RELAY_API_KEY }),
  xendit({ secretKey: process.env.XENDIT_SECRET_KEY!, webhookToken: process.env.XENDIT_WEBHOOK_TOKEN! }),
],
Then register each provider's webhook URL: {baseUrl}/webhooks/{adapterId}, for example https://app.example.com/api/openramp/webhooks/xendit. See the adapter pages.